Best Smart Home Holiday Gifts 2017

Modernize your home with the latest and greatest smart home devices.

Echo Dot — $49.99

The best entry-level Amazon Alexa device that will become the backbone of your smart home.


af6b0-1toqv2_x17nkcxzqb2kvnzg.jpeg

Amazon Echo — $99.99

All the same features as the Echo Dot but with a bigger and better speaker. Looks great in any apartment.


52e2d-1dy-hthqyglww0gcxxqjycq.jpeg

Google Home — $129.00

Prefer Google over Amazon? Google Home offers similar features with Google Assistant built-in to play your favorite songs, tell you the weather forecast, connect your smart home devices and much more.


79530-1ojsjh9jaswzllkn_cvd2la.jpeg

Google Home Mini — $49.99

Google’s entry-level smart home device, especially great if you have an Android phone.


5a10c-1d7aoxfj4529d0un-q1qfjq.jpeg

Sonos One — $199.00

A rich sounding Alexa-enabled speaker, perfect for any music lover.


711f1-1rf4xnwto9z7bp7v_zleuxa.jpeg

Nest Thermostat — $199.99

Easy-to-install smart thermostat, controlled by your smartphone, that will learn your desired temperatures and save you tons on your heating bill.


12e15-17g9wwv_9tvixizsrw0423g.jpeg

iRobot Roomba — $274.99

The only vacuum you need. At a push of a button, it will find every bit of dust on your floors and rugs, even under your bed and couch.


92e10-1hudibamfiphhsbmnliwc7q.jpeg

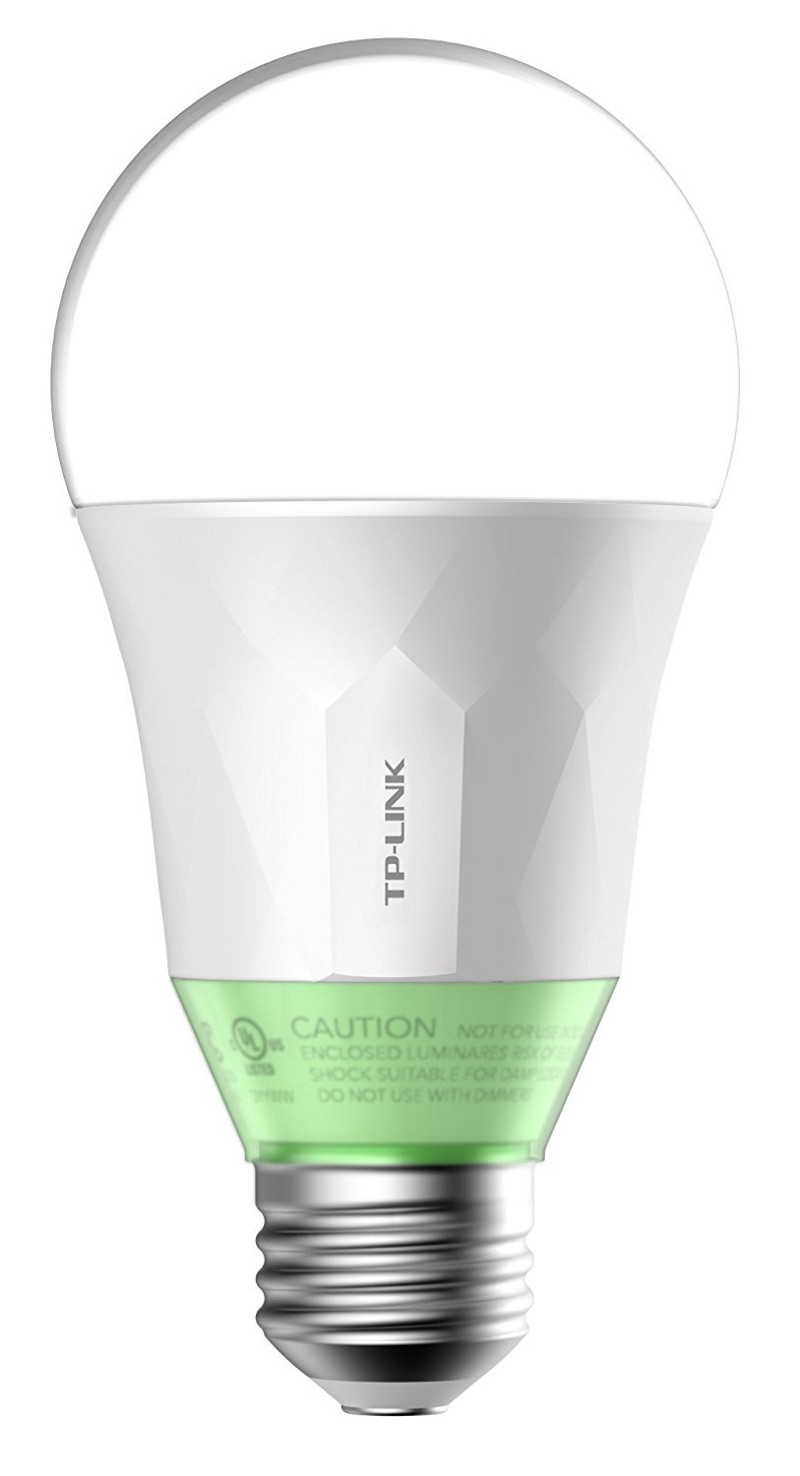
TP-Link Smart LED Light Bulb — $19.99

A great entry-level smart bulb that connects to your home network and doesn’t require a hub.


d231c-1om9fftpbuizjafg72h-mha.jpeg

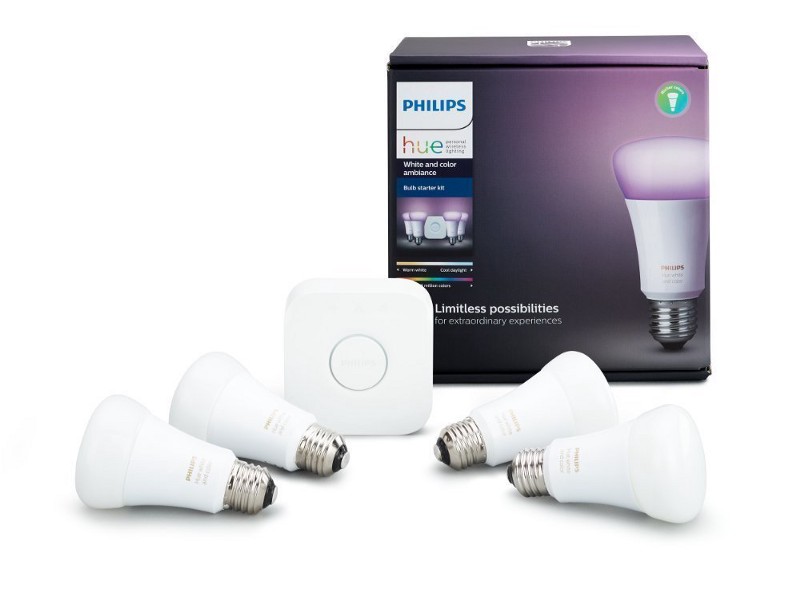
Philips Hue Multi-color — $199.99

A great connected light system with LED bulbs that can display any color imaginable. Freak out your cat by changing colors with voice command using any smart hub.


f05d6-1wfx7nqllc38azugnjb_dta.jpeg

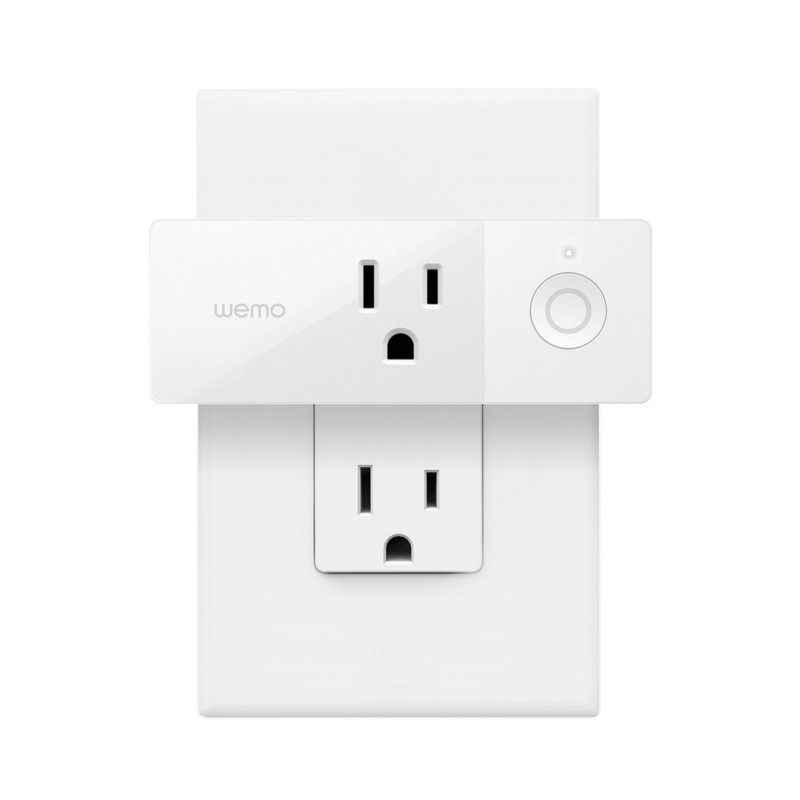
WeMo Smart Plug — $34.99

Anything that is plugged into the wall can be turned into a smart connection with this handy Smart Plug.


9c61e-18wb1yboc0smyoestrkyppw.jpeg

StarTech Bluetooth Audio Receiver — $75.99

Play music from your phone on any stereo with this audio receiver — no cords needed.


799b9-1acuzsge9ulfg2dqsxswddg.jpeg

SkyBell HD Smart Doorbell — $199.99

Ever wonder who is ringing your doorbell? With SkyBell you can see them before they see you.


44735-1wcflkjquwde3bsohsbsbyw.jpeg

Nest Protect Smoke & Carbon Monoxide Alarm — $119.99

It’s about time smoke detectors were updated. Get notified on your phone if your smoke detector goes off.


506a3-1sqou30bncpndyt1gwi-moa.jpeg

Nest Cam Outdoor Security Camera — $199.99

Keep an eye on your house when you’re not home with this smart outdoor security camera.


2dedd-1ummen7yblo3ha9dvqd90ww.jpeg

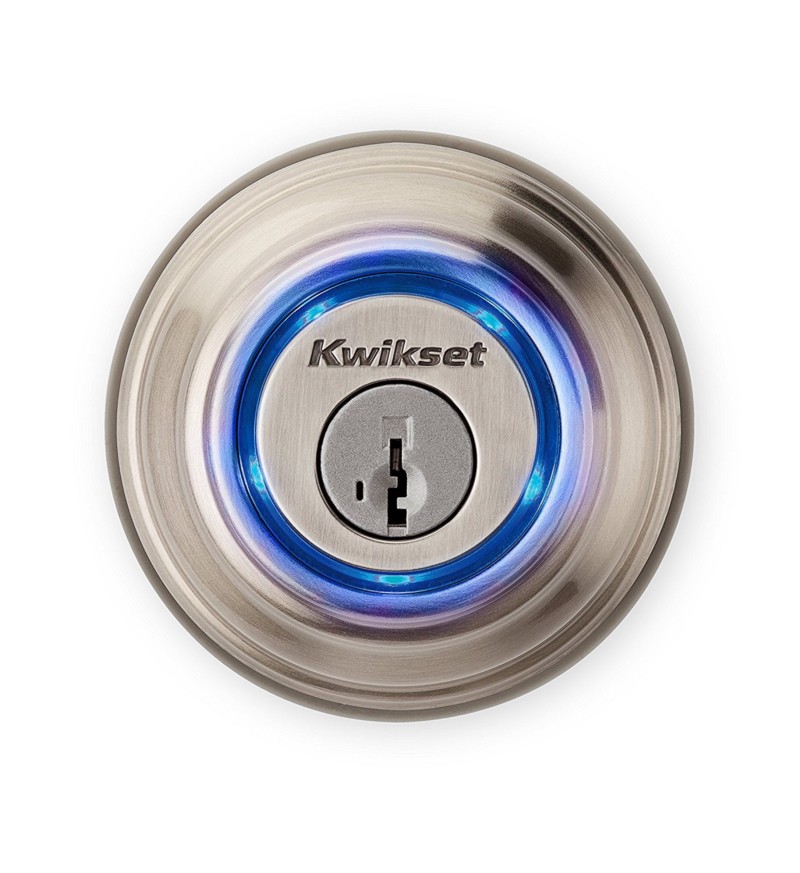
Kwikset Kevo Bluetooth Lock — $229.99

With this smart lock you can open your front door with your phone, but still have the safety backup of a key.


8048d-1-pb8rmzhpm1x9bd6kluwxg.jpeg

August Smart Lock — $229.99

Who needs keys when we have phones? You can even create temporary digital keys for friends or Airbnb guests.


91bf0-1y0h3cmx42qrzm-nbqtutng.jpeg

How to Paint Your Home

In some ways, painting is as simple as can be: apply paint to wall until fully covered. There is a system to painting, however, and a few tricks that can help you avoid common mistakes and pitfalls. Whether you’re sprucing up your old home or your new one, follow these guidelines for a stellar paint job.


449b6-1ewfotqc4r7xc7339lbewww.jpeg

Preparation

Half of a good paint job is in properly preparing the space. These tips apply to both interior and exterior paint jobs.

  • Cover the floor/ground: You can use plastic sheets, old bed sheets, rugs, patches of carpet — whatever is handy and you don’t mind getting paint on.

  • Stir the paint: Doing so will ensure your walls all turn out the same color, so don’t skip this step!

  • Wash the walls: Dirty walls leads to poor paint jobs. Give your walls a good once-over to ensure proper paint adhesion.

  • Fill holes: Examine the walls and door/window frames for nail holes, deep scratches, chips, etc. and fill them up with spackle or caulk, depending on their size. Smooth out with sand-paper afterward to ensure smooth paint coverage.

Basic Guidelines

  • 2–3 coats will usually provide the best coverage. Always wait until each coat is fully dry before starting on the next coat.

  • Wrap paint brushes and paint cans in plastic when taking breaks: This will keep your brushes from drying out.

Interior Paint Jobs

  • Paint from top to bottom: Start with the ceiling and work your way down, leaving the doorframe and doors until last. If you’re applying multiple coats, finish each section before moving on to the next — e.g. finish both coats on the ceiling before tackling the walls.

  • “Cut” the room first: The bulk of your painting will be done with a roller. Before you use a roller, however, you want to use a smaller brush to paint all the edges in the room, i.e. “cutting” the space. Cut where the wall meets the ceiling, the corners of the walls, around window sills and door frames, and above baseboards. Paint a 4–5 inch swath from the edge, so that you can easily finish with a roller later.

  • Using the roller: Use an extender with your roller so you can paint from floor to ceiling in a single stroke. This will ensure a smooth paint job, without dimples and uneven patches. Painting a “W” on the wall with a wet roller, then smoothing in the section will also help to keep the wall evenly loaded with paint.

Exterior Paint Jobs

  • Paint from top to bottom: The same rule applies outside as inside. Start with the gutters/eaves and work your way to the ground.

  • Paint in the shade: Weather permitting, paint in the shade as much as possible, to avoid over-drying in the sun.

  • Paint clapboard side-to-side: Paint 4–5 boards at a time to minimize overlap marks, and begin painting where two boards meet.

  • Keep an eye on the weather: It probably goes without saying that rain will ruin a fresh coat of paint! Also avoid painting in weather below 50 degrees.

Clean Up

  • Clean your brushes: If you want to use your brushes again, use a brush cleaner and water or a solvent (if necessary) to clean your brushes thoroughly. Wrap them in paper towels to dry.

  • Proper paint disposal: Empty cans of latex paint can be tossed out with the trash, once dry. Alkyd paints need to be given to special hazardous waste companies.

Now that you know how to complete a stellar paint job, you need the tools to do so! While you could head over to the hardware store to pick up some supplies, why add yet another errand to your to-do list?

Instead, head over to PaintZen! PaintZen is a full-service painting company that takes care of everything. Step 1: Go here. Step 2: Enter your job info. Step 3: Get a free quote. Step 4: Have all of your painting done.

It’s that simple. Happy Painting! 🙂

Thanks for reading! If you liked this post, please recommend or share it with others. 🙂

Want to talk? Connect with Moved on Facebook, Twitter, and Instagram!

3 DIY Home Repair Tips to Get Your Security Deposit Back

You may think you’ve been a model tenant these past months.

But once the question of getting your security deposit back comes around, you start noticing things. Like that dent in the kitchen from when you slipped and plunged your elbow into the wall. And that scratch in the floor from trying to find an outlet behind your dresser. And the nail and screw holes all over the walls!

Fear not — we’ve put together the following list of DIY home repair tips for you. Follow these tips and you’ll be sure to get your security deposit back!

Patching Small Holes in Walls

What you’ll need: putty knife, spackle/joint compound/caulk, patch kit, sandpaper, paint

What to do: For holes quarter-sized and smaller, simply scrape away loose debris from the hole, then fill with joint compound. Smooth it out with the putty knife, wait for it to dry, then smooth it completely with sandpaper. Paint over the patch and you’re done!

For larger, doorknob-sized holes, you’ll need a patch kit. This is a square of self-adhesive mesh. Cover the hole with this patch, then cover the patch with joint compound, feathering the edges so it blends into the wall. Let dry, sand smooth, and repeat with a second coat. Let dry and paint over.

Patching Large Holes in Walls

What you’ll need: utility knife, putty knife, spackle/joint compound, drywall, drywall tape, wood board, saw, electric drill, wood screws, sandpaper, paint

What to do: Use the utility knife to cut out a square/rectangle around the hole. Cut a piece of drywall to fit the square/rectangle you just cut. For holes around 6-inches, you can get away with just popping in the drywall patch you cut.

For holes larger than 6-inches, you’ll be better off using a wood board to support your drywall patch, so it doesn’t crack. If you need to, cut a wood board to be a few inches longer than the height of your patch hole. Place the wood board in the wall, behind the drywall, and screw it into place, top and bottom.

Place your drywall patch in the square/rectangle you cut, screwing it into the wooden board if applicable. Tape around the edges of the patch with drywall tape, then use the putty knife to spread some spackle/joint compound along the drywall tape. Let dry, sand till smooth and repeat with a second coat. Let dry again, then paint over.

Fill Scratches in Wood Floors/Furniture

What you’ll need: Steel wool, sandpaper, mineral spirits, plastic putty knife, wood filler, natural bristle brush, varnish/ polyurethane. Or crayons!

What to do: Smooth out the scratch with steel wool (for lighter scratches) or sandpaper (for deeper scratches). Make sure to follow the wood grain when doing this. Rub mineral spirits over the scratch to further smooth it out and clean up the fine dust from sanding.

Using a plastic putty knife (to avoid further scratches), fill in the scratch with wood filler that matches the color of the rest of the floor/furniture. Let dry, smooth out with light sandpaper and clean up the dust. Finish off with varnish or polyurethane to match the rest of the floor.

Or, pick a crayon that closely matches the color of the scratched wood, melt it in a microwave over greaseproof paper, and then use a putty knife to fill in the scratch!

For more help getting that security deposit back, make sure to read our two guides on properly vacating an apartment, here and here.

Thanks for reading! If you liked this post, please recommend or share it with others. 🙂

Want to talk? Connect with Moved on Facebook, Twitter, and Instagram!

Do It Yourself Interior Design

Moving into a new home is the perfect time to experiment with some DIY interior design. Everything is already in flux, so you might as well tackle those design projects you never got around to in your last home! The phrase “interior design” may conjure up thoughts of expensive home makeovers, but fortunately, there are many ways to spruce up your new home on a budget.

Here are a few fun ideas to get you started!

Removing popcorn ceiling.

Getting rid of the spackle on your ceilings is not as hard as you might think. If you want a smooth ceiling, use a soaked roller to saturate the popcorn with water, then simply scrape it away with a spackle knife. You can also skip this step entirely and just cover up your ceiling with thin tongue-and-groove wood planks or faux-tin Styrofoam tiles.

Custom design with Sharpies.

Take out the inserts of pillows and use a ruler and some Sharpies to add custom graphic designs to your couch pillows. No need to go overboard here — simple lines or grids can go a long way.

Easy-install wall molding.

Adding trim molding to your walls is an easy way to add character to your home. Head to Lowes or Home Depot for some pre-primed trim-board. Use wood-glue to fix it to the wall, secure with nails, add some caulk and paint and you’re done!

The illusion of extra space.

Hanging mirrors is an age-old trick to make hallways and small rooms seem larger than they actually are. Another way to make a small room appear larger is to decorate with low-slung furniture that stands on legs, so you can see the floor underneath. Certain paint colors can also help, such as PPG Paints Swirling Smoke, Benjamin Moore Cloud White, and Farrow & Ball Skylight.

Open up cabinets.

Add some character and space to your kitchen by removing cabinet doors. You can also now add a piece of art to the back wall to pretty up the space!

Paint, paint, paint.

Paint is one of the easiest, cheapest ways to transform your home. Experiment with different hues for the kitchen, bathrooms and bedrooms. With a few coats of paint, you can also spruce up dingy items found at estate sales or thrift shops, such as old dressers, vases or frames.

Bring in the nature.

Scattering plants around the house is a wonderful way to breathe some life into the room… literally! Succulents are super easy to take care of, and some plants will purify the air in your home, such as spider plants, snake plants, golden pothos, and aloe vera.

Use the rule of three.

Interior design experts have known for years this simple styling secret for surfaces like coffee tables, mantels, and hallway dressers. Use three objects, of different sizes and shapes: something tall and vertical, something wide and horizontal, and something curvy and sculptural to tie it all together.

Hang artwork right.

Hang artwork so that the center of the piece is around 57 inches from the floor; this is the average sightline for most people.

For more tips on making your new house or apartment feel like home, make sure to check out our guide on the topic, here.

Thanks for reading! If you liked this post, please recommend or share it with others. 🙂

Want to talk? Connect with Moved on Facebook, Twitter, and Instagram!

10 Easy Steps to Increase Home Value on a Budget

There are many dramatic steps you can take to boost your home’s value. Most people recognize their house would be worth more after giving the kitchen and bathrooms a full makeover or repainting/residing the outside of the house.

But not everyone can afford such drastic projects! If you’re on a budget, there are still plenty of steps you can take to increase your home’s value before selling it.

Here is a list of 10 steps you can start with today:

  1. Hire an inspector — While you can easily complete the following projects yourself, a professional home-inspector can clue you in to the problems you didn’t even know existed. Some problems may not look like much now but could become a serious problem later on, crippling your home’s value. Best to nip them in the bud now, while they’re still manageable.

  2. Spruce up the yard — It doesn’t matter how nice your home is, if it’s surrounded by a dense jungle of weeds, it’s not going to look very inviting! Don’t worry about a full landscaping makeover quite yet; just start by cutting the grass, trimming the hedges, and cleaning up any trash or clutter.

  3. Is your entryway inviting? — You want it to be, as first impressions are important to potential buyers. Clean the place up, add some plants or flowers, and consider upgrading to a more-energy efficient front door, or at least giving the old one a new coat of paint.

  4. Clean, clean, clean — Pretend you’re a college student frantically trying to get your security deposit back and get down to the nitty-gritty. Clean windows in and out, remove the dust from light fixtures and fan blades, scrub bathroom tile grout, de-stain tubs/showers, rent a carpet cleaner, etc. You can always hire a professional cleaning service, but where’s the fun in that?

  5. Declutter and Organize — A home full of clutter looks cramped. Get started on the packing process by purging your home of old stuff you don’t need anymore, and organizing what’s left to make rooms appear larger and more open.

  6. Add storage — Buyers want storage space, and since you’ll soon be following step 5 to declutter and organize your home, now is the perfect time to accommodate them! Add a wardrobe to a living room or a simple wire-rack storage to a closet for an easy home-value boost.

  7. Light things up — Replace heavy drapes with blinds or shutters to make your home brighter and seem larger and more open. Add mirrors to spread light around and make small cramped rooms and hallways seem larger than they really are. Head to a local estate sale and grab one for cheap! Upgrade to brighter, more energy-efficient light fixtures, and install dimmer switches.

  8. Update your kitchen — The kitchen is the single best room to upgrade to maximize a home’s value. Some simple upgrades can go a long way here, like shiny new knobs/handles for your cabinets, drawers and faucets and eco-friendlier parts for your faucets. Check out Danco.com for water-saving plumbing parts and DIY plumbing tutorials.

  9. Update your bathroom — After the kitchen, bathrooms will get you the most bang for your buck in terms of increasing your home’s value. The same upgrades as in the kitchen will attract potential buyers: new handles, new faucet parts, and new light fixtures. You can also install a more powerful, energy-efficient shower head, or replace the entire bathroom vanity without spending too much money.

  10. Kill squeaky doors/cabinets — Spray hinges with WD40 and get rid of that creepy door sound once and for all!

Thanks for reading! If you liked this post, please recommend or share it with others. 🙂

Want to talk? Connect with Moved on Facebook, Twitter, and Instagram!

How to Make a New House Feel Like Home

You did it! You pulled off your big move, without forgetting or damaging anything, and you’re fully unpacked. And yet, in some ways, successfully moving into a new place is only the beginning.

Read on for some tips and guidelines for the next big item on your moving checklist: making your new house/apartment feel like home.

Check Off the Official Stuff

  • Make sure important papers are organized. This means everything related to the move (insurance contracts, bill of lading, moving contracts, leases, etc.), as well as all your personal documents (medical, dental, school records, etc.)

  • Complete your change of address with everyone you need to: insurance companies, banks, the DMV, employers, etc.

  • Register to vote!

Ensure Your Safety

  • Install new locks and security systems. If you’re renting, talk with your landlord before doing so.

  • Make sure smoke alarms and carbon monoxide detectors are working, and you have a full fire-extinguisher.

  • Locate your water shutoff valve and circuit breaker board.

Get Your Bearings

  • Locate the nearest hospital, police station, fire station, pet hospital, gas station, grocery store, bank and post office.

  • Find a new doctor, dentist, pediatrician and veterinarian.

  • Find out the trash/recycling pickup times.

  • A great way to start feeling like a local is to act like one! That means going to the best places to eat, relaxing in the most beautiful spots, hiking the best trails, etc. You can talk to your neighbors, chat up the locals (use the always well-received “I just moved here” line) or use the wonders of the internet. Try sites like Yelp or Zomato for great food, seek advice on Facebook/Twitter, or check local blogs for the inside scoop.

Get Your Kids and Pets Settled

  • Organize Skype calls with friends, family and favorite babysitters from your prior hometown.

  • If you haven’t done so already, now’s the time to find new schools for your kids! Definitely include older children in the selection process.

  • Volunteer at schools, go to parks to find friends and setup playdates for your pets and young ones.

  • Moving is stressful for everyone, so expect some level of regression and difficult behavior.

  • Give both your kids and pets time and space to adjust. Accept that it could be weeks or months until they feel fully settled and at home.

Connect with Your Community

  • Throw a house-warming party to get to know your new neighbors, who could one day become your future babysitters, friends, pet-sitters and even fellow survivors in the aftermath of the zombie apocalypse!

  • Check with your local Home Owner’s Association to see if there are any rules you should know about (such as what you can or cannot add to your home).

  • Join clubs/activities organized by the community. Check out the community board at the local library and sign up for local magazines and newspapers. Meetup is also great for both keeping up old hobbies and starting new ones.

Thanks for reading! If you liked this post, please recommend or share it with others. 🙂

Want to talk? Connect with Moved on Facebook, Twitter, and Instagram!

The Best Way to Unpack for a Stress-Free Move

Moving into a new home is certainly an accomplishment, one to be acknowledged and appreciated. But the moving process doesn’t stop there! Unfortunately, you are only halfway done — now you have to un-pack.

Just like packing, there’s a smart way to unpack, and plenty of not-so-smart ways! Follow these guidelines for the smart way to unpack:

Upon Arriving

  1. Explore — Take some time to look around and feel the space out before you dive into the unpacking frenzy, especially if you have kids. Appreciate the calm before the storm.

  2. Check utilities — Make sure the utilities are all on and working.

  3. Clean — Consider cleaning before you bring anything inside and start the unpacking process. Yes, your landlord or the last tenants or owners most likely did so already, but this way, you know it’s clean!

  4. Check for damages — As you or movers bring your things inside, be on the lookout for any obviously damaged boxes. Check major appliances like dryers, washing machines, etc. for damages as well.

Unpacking

To avoid overwhelm and minor breakdowns, break the unpacking process down into manageable chunks.

Start with your essentials box(es) — (you packed one of those, right?) Open it up and divvy up its contents into various rooms. I like to set things up in the following order:

  1. Beds — Decorations and clothes can wait, but at the very least make sure you have a bed to crash into at the end of the day!

  2. Food — Once your beds are ready for later, it’s time to make sure you can eat. Again, leave the bulk of your kitchen-ware for later, and for now, just unpack enough for basic meals for the next day or two.

  3. Bathrooms — Next on the essentials list is the bathroom. Get at least one bathroom in working order so that everyone can shower, brush their teeth, etc.

  4. Living Room — For many, a couch and working TV is close behind sleep, food and showers in terms of essentials! A well-deserved family movie is a great way to unwind after a long day of unpacking, as well as a good incentive for kids to help you out during the day.

  5. Decorations — Before you dive into the thick of the unpacking, take some time to set up a few family photos, children’s artwork and homey knick-knacks around the house, to help you feel more at home.

  6. Tackle the rest of the house — Now that you have a functional kitchen, living room, and bedrooms and bathrooms for everyone, it’s time to dive in!

Move from the ground up: rugs, furniture, things to fill cabinets, drawers, etc., and then decorations (artwork, posters, etc.). Leave closet and storage space-items for last.

Common areas like the kitchen, living room, dining room, hallways are best to tackle during the day, when everyone is energized. Leave individual rooms for the evening/night-time to give everyone a chance to unwind and settle into their personal space at the end of the day.

Follow these guidelines and you’ll find yourself unpacked and box-free in no time! For help with what to do next, check out our guide: Tips for Settling into Your New Home.

Thanks for reading! If you liked this post, please recommend or share it with others. 🙂

Want to talk? Connect with Moved on Facebook, Twitter, and Instagram!