Start 2 Months Beforehand —The Ultimate Moving Checklist + Timeline

Everyone knows that moving is a long and involved process. You can choose to either stress out over the seemingly unlimited tasks that need to get done, or you can conquer your move by planning in advance. Here is a breakdown for what you should be doing prior to your move:


c62a3-0os-0uenntjdojacp.jpg

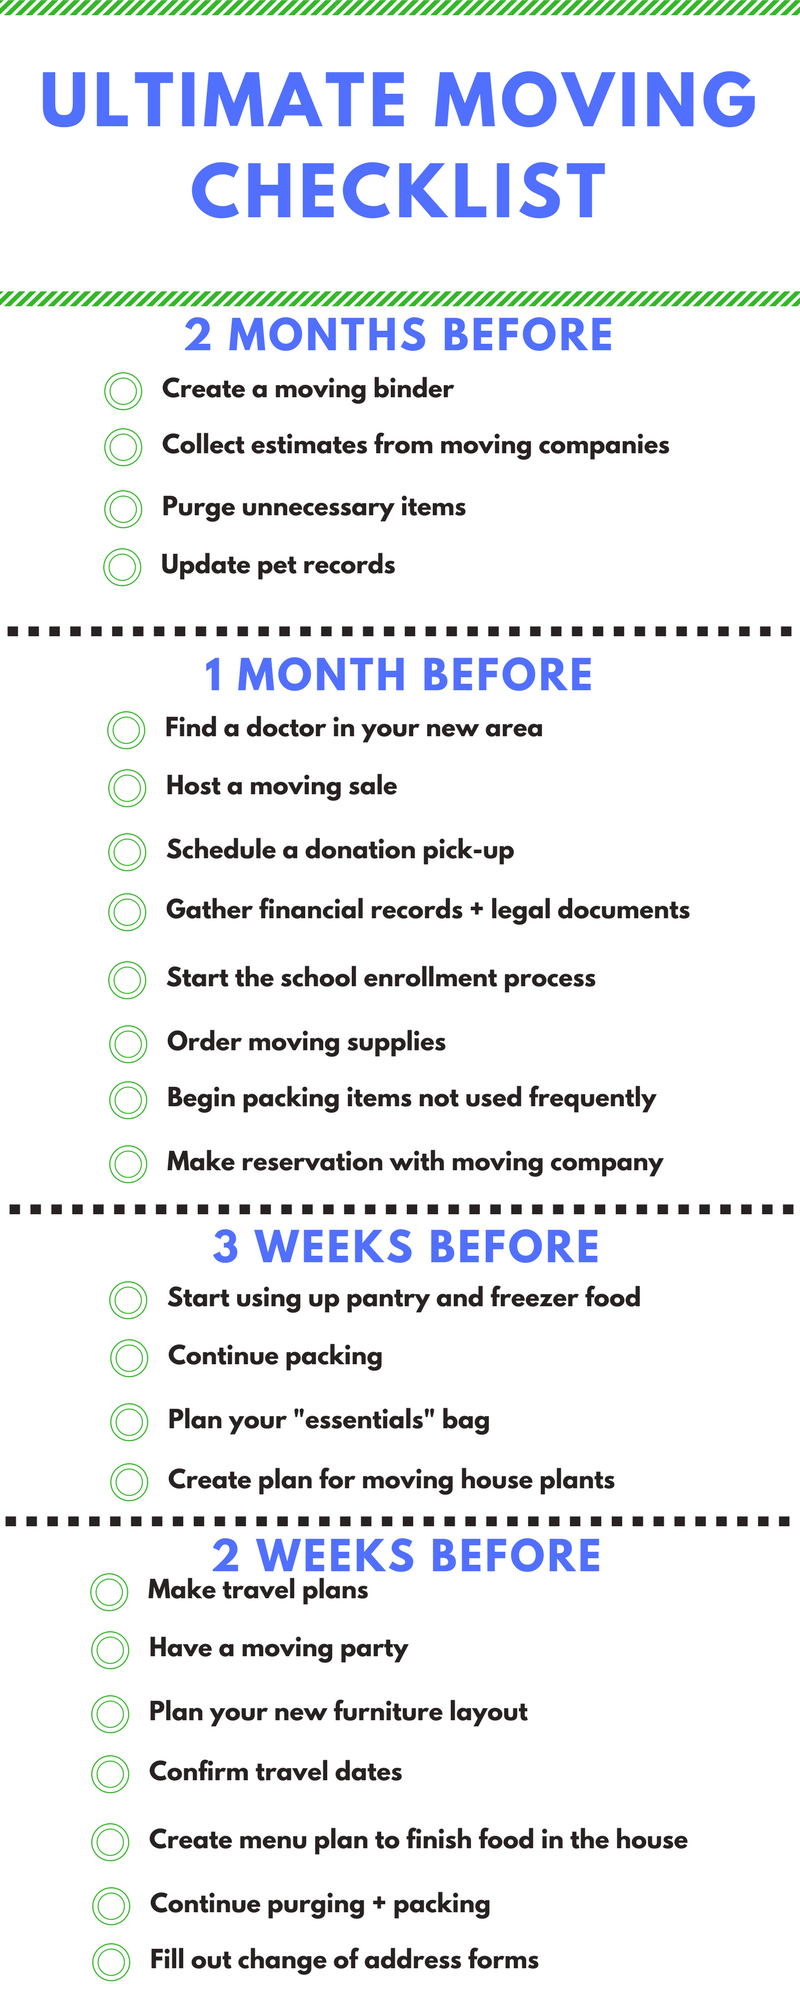
2 Months Before

Create A Moving Binder

This could be a physical binder, or if you prefer going paperless use an app like Evernote. Keep all your notes, receipts, confirmation numbers, and documents that you need for moving.

Start Collecting Estimates from Moving Companies

Begin to estimate how much your move is going to cost. Don’t forget to compare prices between companies and shop around. Or, let Moved do this for you. We’ll obtain the best quotes for your move, saving you time, stress, and money!

Purge

It is never too early to start getting rid of things you don’t need. Start early and work through one room at a time.

Get Updated Pet Records

This could be required by your new landlord or HOA, and will be much appreciated by your new vet.

1 Month Before

Get Doctor Recommendations For Your New Area

It can take several weeks for your current physician’s office to transfer your records over to a new office, so you don’t want to delay.

Host a Moving Sale

Sell the items you don’t want to take with you. If you live in an apartment or don’t want to host a sale, there are plenty of online options to choose from — try Craigslist, LetGo, or OfferUp. Donate anything that doesn’t sell.

Schedule a Donation Pick-up

Gather the items that you want to donate and call a donation center in your area that will pick up items. Be sure to schedule the pick-up at least one month before you move as they book up far in advance.

Gather Copies of Your Financial Records and Legal Documents

These are documents that you don’t want to worry about finding once everything is boxed up. Gather them into one place and make sure you know where they are at all times.

Start the Process of School Enrollment

If you have children find out what requirements they need to enroll in their new school, such as shot records and a physical.

Order Your Moving Supplies

You will need lots of boxes and packing supplies to protect your valuable items. Try contacting grocery stores and flower shops in your area to see if you can collect the boxes they are finished with.

Begin Packing the Items That You Do Not Use Often

Clearly label the boxes of things you already have packed away, such as holiday decorations

Reserve Your Moving Date With the Moving Company

Confirm the finer details of the move — such as suggested form of payment, what’s included and not included in the quote (i.e. disassembly of items, reassembly of items, insurance, arrival time, etc.).Read more here on working with a moving company.

3 Weeks Before

Start Using up Pantry and Freezer Food

When grocery shopping start to only buy what you need for the immediate time. You don’t want to pay extra to move boxes of cupboard staples.

Continue Packing

Work at a steady pace so you aren’t having to rush at the end. Taking your time will ensure that you have time to properly label your boxes as you go.

Think About Your “Essentials Bag”

This bag could include things like your Moving Binder, toothbrush, toothpaste, medication, phone charger, and a roll of toilet paper. This is a bag that you will take with you as you move instead of putting on the truck. Having the list prepared early will stop you from accidentally packing these items.

Develop a Plan for Moving Any House Plants

You cannot move them on the trucks. Depending on what type of plant you have, you could try shipping them or if at all possible bring them with you in your vehicle. If they are too large consider your option of just taking a clipping with you to start again in your new home.

2 Weeks Before

Make Travel Plans

If you are making a long-distance move you will need travel reservations. If you are driving long distance, have your car serviced to make sure it is ready and safe for travel.

Have a Moving Party

Throw yourself a moving party so you have a last chance to say good-bye to family and friends in the area.

Plan Your New Furniture Layout

Develop a plan for where you are going to place furniture in your new home. Draw a sketch to help movers place items in your new home.

Confirm Travel Dates with the Moving Company

Confirm dates and times with any company that will be involved with your move.

Create an Easy Menu Plan

The coming week is going to be busy and many of your kitchen items will be in boxes. Eliminate needing to spend time cooking and cleaning dishes.

Continue Purging Items and Packing

Really thing about what items you need and purge everything else.

Start Working on Your Change of Address Forms

Moved can update your address with the postal service, free of charge!

1 Week Before

Purge and Pack Everything

If you don’t use it on a daily basis it is time to pack it up. If you do use it on a daily basis then you will most likely want to mark it for your Essentials Bag.

Contact credit card companies and banks with your new location and moving date

Charges in a new location can cause your account to be flagged.

Prepare your appliances

If you are moving your refrigerator make sure that you empty and defrost it with at least 24 hours to go before your move.

Pack your outdoor items

Drain water from the outdoor hose and prepare all outdoor furniture and landscaping items for the move. Drain gasoline from lawn mowers, trimmers, and other equipment.

Deep clean the house or apartment

If you were renting make sure you do any repairs necessary to get your security deposit back.

Notify your service providers and utility companies about your move

This includes trash, lawn-care, daycare, electric, cell phone, internet etc.

Transfer memberships

If possible transfer your memberships at places like health clubs, gyms, or business networking groups.

Day Before Moving

Pack your essentials bag

Include any clothes you will need for moving day and a few days until you are settled in your new home

Complete the remainder of packing

It’s time for anything that is still unpacked to get packed.

Moving Day

Start early

Moving day always takes longer than expected so start early.

Get ready for the movers

Place flooring protector throughout your house since your helpers or movers are not going to be taking shoes on and off as they enter and exit.

Double check all rooms

Look inside of closets and cabinets to make sure that you have not forgotten anything. Don’t forget the attic, basement, and garage if you have them.

Have a moment

Take one minute to walk through once your home is empty and soak in all the good memories that you had. Then make sure all windows and doors are locked and the keys have been transferred.

Post-Move

Hang on to all of your receipts for your moving expenses.

If any discrepancies come up later you will want to have a good record.

If you have moved states get your new driver’s license and tags for your vehicle

This process differs from state to state. Contact the DMV prior to going into the office so you know exactly what you need to have. Keep your vehicle titles, birth certificate, and proof of residency together in one location during your move.

Register to vote

If moving out of state this is easily completed when obtaining your new driver’s license.

Send out a change of address to all family and friends

Family and friends might not send you mail on a regular basis so make sure you notify them of your new address. The change of address card that you complete with the USPS will not help if they mail you something after the 6 month period.

Settle in and get to know your new home

Take time to enjoy establishing your new home. Hit the streets and find your new favorite restaurants and hang out spots.


Here is a printable version of our moving checklist!


98aa2-1-dpz-dyp4ixkattaa8d8pg.png

Thanks for reading! If you liked this post, please recommend or share it with others. 🙂

Want to talk? Connect with Moved on Facebook, Twitter, and Instagram!

4 Reasons You Should Move More Often

We get it — the thought of moving typically send shivers down your spine. The packing, the unpacking, scheduling movers, changing your address— the process can feel overwhelming. But, there is actually a lot that can be gained from moving more often.

1. Moving Gives You a New Adventure

If you aren’t excited about where you live, it’s time to make a move! There are so many places to explore and things to see.

Try making a BIG move and set off to a new state. Head to the coast and experience the salt life — fresh seafood dinners, beautiful beaches and the sand between your toes. Maybe take off to the mountains and live the ski bum / hiker life. The country is filled with unique adventures!

Is that a little too much adventure for you? Do you have a job you love and don’t want to leave? Find a new place within your current city to move. It’s easy to get stuck in a rut of visiting the same restaurants and activities within close proximity of your home. Shake it up a bit! Moving lets you find new restaurants, new social groups, new night life, and maybe even a new hobby or two.

Whether you are moving neighborhoods or across the country, a new adventure will await you.

2. Moving Can Save You Money

That’s right! Chances are when you think of moving you think of all the money you will be spending — first and last month’s rent, security deposit, professional movers, boxes, bubble wrap, and all that comes along with it. But, making a move can actually benefit you financially. Here are some ways you can save money:

  • Finding a place that is cheaper to rent will save you money month after month.
  • Mortgage rates are still close to record setting lows. You might be able to make the jump to being a homeowner and put your money towards a long-term investment.
  • Stuff might cost less. Retailers charge different prices based on the area. You could move one zip code over and find your favorite products at the store for a lower price.
  • Lower property, income and sales taxes.
  • A shorter commute can save you some cash on gas, cabs or public transportation.
  • All those coupons! When you change your address, you get a magical envelope in the mail with all kinds of coupons and discount codes. (Ok, so maybe this alone isn’t the best reason to move, but you’ll save a bit on new home purchases.)

3. Moving Makes You Eliminate Junk

Let’s face it, once you have lived in a place for a few years you have accumulated a lot of stuff that you don’t need anymore. It may be things that meant something to you at the time, but don’t anymore, or just things you held onto for no reason at all.

Start by getting rid of the things that you have never used or will never use again. Do you still have that Crock-Pot that you got for your birthday from Grandma last year? What about a bag full of stuffed animals from when you were a child? Or clothes that have been pushed to the darkest parts of your closet? Moving is the perfect time to rid these items.

Next, move on to the things that you have too many of. Do you really need 40 winter jackets, 50 pairs of shoes and 200 books that you’ve already read? Choose a few of your favorites and toss (or donate!) the rest.

4. Moving Gives You a Fresh Start

Everyone needs a fresh start from time to time. Maybe you received an exciting new job opportunity with a big pay raise in a new city. Or, maybe the end of a relationship is giving you the chance to find a new start. Whatever event is going on in your life, a move to new home can be just the thing you need.

The place you live is more than four walls — it’s your home and it holds memories and reminders of the past. If the time has come for you to move on, do it!

Let’s be honest… sometimes the process of moving can suck. But, the results of moving can payoff for you mentally, relationally and financially.

5 Tips For Efficient & Stress-Free Packing

Does the thought of packing overwhelm you? Follow these five simple tactics to eliminate stress and increase efficiency.

Declutter and organize before you pack a single box.

Similar to cooking a meal in a dirty kitchen, you don’t want to start packing in a messy space. Clean up and get organized as if you were impressing guests. It will be much easier to sort your belongings when they’re not hidden under three loads of laundry.

Choose high quality boxes — even if they cost a bit more.

Once you’re ready to begin packing, make sure your boxes are in decent shape. Nothing will send you over the edge quicker than a box tearing through the bottom as you carry it downstairs. Save yourself from this common packing nightmare by spending the extra penny on quality moving boxes. These can be found at almost any home improvement retailer, or you can easily purchase them through Moved.

Start packing the items used least often.

Think of that Crock Pot currently buried behind all of your pots and pans, or the heavy winter jackets that have been stored away for Spring. Rule of thumb: if you aren’t currently using it, pack it. On the flip side, note all of the must-have items (think: toothbrush, underwear, phone charger) which you cannot live a day without. You’ll want to proactively pack these into an essentials bag so you aren’t rummaging through boxes to find a fresh pair of undies.

Fit more into a box by repurposing household items.

Packing efficiently will make for less boxes. Pack bulkier items at the bottom of the box and avoid empty space so things aren’t shuffling around in-transit. To further ensure that space isn’t wasted, fill items that have an opening. For example, pots and jars are great places to put folded kitchen towels and utensils. Tupperware and water bottles can also carry accessories, earbuds, or other small knick-knacks. Bedsheets and pillow cases can be used to wrap delicate items. Before you tape up your box, triple check for any free space.

Label. Everything.

Labeling will save you from a huge headache when unpacking. Label boxes with what they contain (“framed pictures”) and which room they belong (“living room”). If you want to go the extra labeling mile, list boxes by unpacking priority (H)igh, (M)edium, (L)ow and place a label on each side of the box so it’s visible when stacked.

These 5 packing tips will help you maintain sanity and keep organized. Pack away!

How to Paint Your Home

In some ways, painting is as simple as can be: apply paint to wall until fully covered. There is a system to painting, however, and a few tricks that can help you avoid common mistakes and pitfalls. Whether you’re sprucing up your old home or your new one, follow these guidelines for a stellar paint job.


449b6-1ewfotqc4r7xc7339lbewww.jpeg

Preparation

Half of a good paint job is in properly preparing the space. These tips apply to both interior and exterior paint jobs.

  • Cover the floor/ground: You can use plastic sheets, old bed sheets, rugs, patches of carpet — whatever is handy and you don’t mind getting paint on.

  • Stir the paint: Doing so will ensure your walls all turn out the same color, so don’t skip this step!

  • Wash the walls: Dirty walls leads to poor paint jobs. Give your walls a good once-over to ensure proper paint adhesion.

  • Fill holes: Examine the walls and door/window frames for nail holes, deep scratches, chips, etc. and fill them up with spackle or caulk, depending on their size. Smooth out with sand-paper afterward to ensure smooth paint coverage.

Basic Guidelines

  • 2–3 coats will usually provide the best coverage. Always wait until each coat is fully dry before starting on the next coat.

  • Wrap paint brushes and paint cans in plastic when taking breaks: This will keep your brushes from drying out.

Interior Paint Jobs

  • Paint from top to bottom: Start with the ceiling and work your way down, leaving the doorframe and doors until last. If you’re applying multiple coats, finish each section before moving on to the next — e.g. finish both coats on the ceiling before tackling the walls.

  • “Cut” the room first: The bulk of your painting will be done with a roller. Before you use a roller, however, you want to use a smaller brush to paint all the edges in the room, i.e. “cutting” the space. Cut where the wall meets the ceiling, the corners of the walls, around window sills and door frames, and above baseboards. Paint a 4–5 inch swath from the edge, so that you can easily finish with a roller later.

  • Using the roller: Use an extender with your roller so you can paint from floor to ceiling in a single stroke. This will ensure a smooth paint job, without dimples and uneven patches. Painting a “W” on the wall with a wet roller, then smoothing in the section will also help to keep the wall evenly loaded with paint.

Exterior Paint Jobs

  • Paint from top to bottom: The same rule applies outside as inside. Start with the gutters/eaves and work your way to the ground.

  • Paint in the shade: Weather permitting, paint in the shade as much as possible, to avoid over-drying in the sun.

  • Paint clapboard side-to-side: Paint 4–5 boards at a time to minimize overlap marks, and begin painting where two boards meet.

  • Keep an eye on the weather: It probably goes without saying that rain will ruin a fresh coat of paint! Also avoid painting in weather below 50 degrees.

Clean Up

  • Clean your brushes: If you want to use your brushes again, use a brush cleaner and water or a solvent (if necessary) to clean your brushes thoroughly. Wrap them in paper towels to dry.

  • Proper paint disposal: Empty cans of latex paint can be tossed out with the trash, once dry. Alkyd paints need to be given to special hazardous waste companies.

Now that you know how to complete a stellar paint job, you need the tools to do so! While you could head over to the hardware store to pick up some supplies, why add yet another errand to your to-do list?

Instead, head over to PaintZen! PaintZen is a full-service painting company that takes care of everything. Step 1: Go here. Step 2: Enter your job info. Step 3: Get a free quote. Step 4: Have all of your painting done.

It’s that simple. Happy Painting! 🙂

Thanks for reading! If you liked this post, please recommend or share it with others. 🙂

Want to talk? Connect with Moved on Facebook, Twitter, and Instagram!
The Top 5 Rental Truck Companies

If you’ve decided to move yourself, and you want to hire a rental truck, you should know what options are available to you. While most cities will have many local options for you to choose from, there are five major national rental truck companies: U-Haul, Budget, Penske, Ryder and Enterprise.

Here’s what you need to know about each one:

U-Haul

U-Haul is by far the most popular and well-known rental truck company out there. Here are some notes…

  • Over 20,000 locations across the U.S.
  • Widest selection of truck rental options: pickup trucks, cargo vans, 10’, 15’, 17’, 20’, 26’ trucks. Added bonus: even their smallest truck (10’) can tow vehicles.
  • A number of cargo, utility and car trailers available for rent.
  • U-Box containers: these are basically portable storage containers.
  • One month of free self-storage with one-way equipment rentals.
  • Guaranteed reservations: if the equipment you reserved is unavailable when you need it, you get $50.
  • Storage/packing materials available for purchase: boxes, tape, furniture pads, plastic wrap, bubble wrap, etc.
  • Reserve with cash, credit or debit cards.
  • Offers one-way move options (good for long distance moves).

Budget

  • Four different vehicle options: cargo van, 12’ 16’ and 24’ trucks. The 16’ and 24’ trucks both have 3 seats available in the cab, tow capacity and a loading ramp for easy loading.
  • Car carriers and tow dollies available for rental.
  • You can also rent furniture pads and hand trucks (dollies).
  • No reservation guarantees. Of course, Budget claims they do not overbook, but sometimes overlap can happen, and if it does, you’re left in the dust.
  • Credit card required for reservations.
  • Offers one-way move options (good for long distance moves).
  • Discounts for military, veterans, students, police, fire and EMT, AARP, motor club and Bar Association members.

Penske

  • Large fleet of over 50,000 trucks, which Penske claims are the newest and best-maintained vehicles in the business.
  • 2000 pick-up/drop-off locations, including all Home Depot locations.
  • 12’, 16’, 22’, 24’ truck rental options. Loading ramps and vehicle towing available on the three largest truck options.
  • Packing supplies available for purchase, including boxes, tape, furniture pads, mattress bags, hand trucks, box cutters, bubble wrap, etc.
  • Offers vehicle towing equipment rentals and self-storage options.
  • Guaranteed reservations if made 48 hours in advance.
  • Offers one-way move options (good for long distance moves).
  • Discounts for military, veterans, students.

Ryder

  • 500 pick-up locations across the continental US.
  • Rental options include cargo vans and 20’ and 26’ trucks, both of which have lift-gates.
  • No vehicle towing options available for rental and you are not allowed to tow your own trailer if you have one.
  • Does not offer one-way move options, so best for local moves. You can take the truck as far as you want, but you’ll have to return it to the same place from which you picked it up.
  • Credit card required for reservations.

Enterprise

  • 250 pick-up locations across the continental US.
  • Many rental options: 15’, 16’, 24’, and 26’ trucks, ½ ton, ¾ ton and 1 ton pickup trucks and five cargo van options. The largest three trucks have lift gates.
  • No vehicle-towing equipment available for rent. To tow your vehicle, you’d need to rent the ¾ ton or 1-ton pickup truck and use your own car carrier or tow dolly.
  • No one-way rental options, so only good for local moves.

For more information on rental trucks, check out our guide on Finding the Best Rental Truck Deal.

Thanks for reading! If you liked this post, please recommend or share it with others. 🙂

Want to talk? Connect with Moved on Facebook, Twitter, and Instagram!
7 Helpful Apps to Use During Your Move

Apps aren’t just about entertainment and chasing Pokemon. They can also help you stay sane and organized during a move! Here are seven apps that will do just that:

Moved

Well, we kind of have to mention our own app! 😉 The Moved app serves as a central hub for all things moving. First and foremost, you’ll be connected with your own personal moving assistant who helps throughout the entire process. Use the Moved app and your personal assistant to help with pretty much anything you can think of related to your move. Book a mover, update your address, sell your couch, get packing materials, find a storage unit, insurance quotes… and much more!

Sortly

Sortly claims to be “the ultimate organizer app”, and it certainly goes a long way to deliver on that promise. Using Sortly, you can create a digital inventory of everything you own, organized with folders, photos, notes, tags, 15-sec videos and printable QR labels. Keeping track of everything you own in this way can serve as an invaluable resource during the hectic craziness of a move.

MagicPlan

MagicPlan lets you create digital floor plans of your home with your iPhone or iPad camera. Using your phones camera, you look around the room, and mark where the corners are. The app then creates a detailed floor plan for you! This app also connects with the Floorplanner website. Using the two services together, you can plan your new home’s furniture layout quickly and easily, in beautifully rendered 2D and 3D designs.

Houzz

Need help with interior design? Houzz is your spot to get new design ideas, find professionals, and shop for your home. You can do it yourself or hire a pro to make your new home look amazing.

Evernote

Evernote keeps all your notes (whether a to-do list, photo, snippet of text, or a full document) together in one place, easily synced across all your devices. Available on all Android and iOS devices, as well as Mac and PC laptops and tablets.

Snap N Pack

This app helps you keep your things organized. Take photos of your things, assign a group of them a QR code, then print that QR code and slap it on the box. Think of it as high-tech labelling! When it’s time to unpack, you can scan the QR code with your phone and know exactly what’s inside.

Wunderlist

One of the most popular planning apps in the world, Wunderlist will help you stay organized and on top of the long list of various tasks required for a successful move. You can keep all your to-do lists in here, organized by folder and hashtag. Set due dates and reminders so you don’t forget anything, and share to-do lists with others. You can even assign tasks and lists to others. Like Evernote, Wunderlist is available on pretty much any internet-accessible device.

For more help keeping organized during a move, check out our post on the topic, here.

Thanks for reading! If you liked this post, please recommend or share it with others. 🙂

Want to talk? Connect with Moved on Facebook, Twitter, and Instagram!

How to Work with the Moving Company

A professional moving company can certainly take a lot of the work and stress of a move off your plate. However, there are still a number of things you’ll need to do to ensure the entire process moves along smoothly and efficiently. Here’s what you should do:


b75bb-1t8dyy0pt1bgmf4jcqzv6ra.jpeg

Before the Movers Arrive

  • Clear a space for the moving truck: Make sure the moving truck has space to park in front of your house, or if that’s not possible, as close to your home as possible. Move your cars if you need to. The farther the truck is away from your home, the more work you’re creating for your movers. Many moving companies will also charge you extra if they have to park down the street.

  • Clear walkways: Remove plants, hanging plants, toys, wind-chimes, rugs, etc. The last thing you want is for a mover (or yourself for that matter) to trip over a stray toy while carrying your TV!

  • Create a moving inventory: This is a detailed list of everything you own, and what you want to do with it. Separate items into categories: what you want to move yourself, what you want packed in the moving truck, etc.

  • Clearly mark what will be packed vs. not packed: Save your movers the hassle of wondering which boxes and items are supposed to be left untouched and clearly label everything beforehand. Or better yet, section off an entire room to be off-limits.

  • Keep important documents with you: Moving contracts, insurance papers, etc. You don’t want to lose these in the packing process!

  • Engage in some targeted pre-packing: Depending on what service you’ve purchased, you may not be obligated to do anything before a move. But little things can make the process move along much more smoothly, such as:

Unplugging electronics

Removing batteries

Taking artwork and photos off the wall

Disassembling furniture

Pre-packing small items, such as office supplies, knick-knacks, refrigerator magnets, etc.

Stripping beds

Emptying the trash

  • Keep pets and kids out of the way! Avoid accidents and unnecessary havoc and arrange to have them stay in a separate room on moving day, or better yet, out of the house with friends or family.

During the Move

  • Let movers know which boxes are most valuable. Quality moving companies will handle all your goods with care. That said, a box of pillows will be handled differently than a box of China. Let your movers know what they need to take extra care handling.

  • Be present during the packing process: If you plan ahead well, you shouldn’t run into too much confusion or too many problems. But moves are tricky, and issues are bound to arise. Everything will go much more smoothly if you’re around to answer questions.

  • Let your movers know which bathroom to use!

  • Take care of your movers! These guys are working hard, and will appreciate some pampering. Massages and spa treatments aren’t necessary (though they’d probably be welcomed!) — simple, weather-appropriate food and drinks will go a long way. Fresh-baked cookies get you bonus points!

  • Make sure the truck driver has your contact info. And make sure you have his/her contact info as well. If the driver gets lost or in an accident, you’ll want to be the first to know.

  • Compare inventories: Before the truck leaves for your new home, compare your inventory with the moving company’s to ensure nothing is left behind or missing.

Thanks for reading! If you liked this post, please recommend or share it with others. 🙂

Want to talk? Connect with Moved on Facebook, Twitter, and Instagram!

3 DIY Home Repair Tips to Get Your Security Deposit Back

You may think you’ve been a model tenant these past months.

But once the question of getting your security deposit back comes around, you start noticing things. Like that dent in the kitchen from when you slipped and plunged your elbow into the wall. And that scratch in the floor from trying to find an outlet behind your dresser. And the nail and screw holes all over the walls!

Fear not — we’ve put together the following list of DIY home repair tips for you. Follow these tips and you’ll be sure to get your security deposit back!

Patching Small Holes in Walls

What you’ll need: putty knife, spackle/joint compound/caulk, patch kit, sandpaper, paint

What to do: For holes quarter-sized and smaller, simply scrape away loose debris from the hole, then fill with joint compound. Smooth it out with the putty knife, wait for it to dry, then smooth it completely with sandpaper. Paint over the patch and you’re done!

For larger, doorknob-sized holes, you’ll need a patch kit. This is a square of self-adhesive mesh. Cover the hole with this patch, then cover the patch with joint compound, feathering the edges so it blends into the wall. Let dry, sand smooth, and repeat with a second coat. Let dry and paint over.

Patching Large Holes in Walls

What you’ll need: utility knife, putty knife, spackle/joint compound, drywall, drywall tape, wood board, saw, electric drill, wood screws, sandpaper, paint

What to do: Use the utility knife to cut out a square/rectangle around the hole. Cut a piece of drywall to fit the square/rectangle you just cut. For holes around 6-inches, you can get away with just popping in the drywall patch you cut.

For holes larger than 6-inches, you’ll be better off using a wood board to support your drywall patch, so it doesn’t crack. If you need to, cut a wood board to be a few inches longer than the height of your patch hole. Place the wood board in the wall, behind the drywall, and screw it into place, top and bottom.

Place your drywall patch in the square/rectangle you cut, screwing it into the wooden board if applicable. Tape around the edges of the patch with drywall tape, then use the putty knife to spread some spackle/joint compound along the drywall tape. Let dry, sand till smooth and repeat with a second coat. Let dry again, then paint over.

Fill Scratches in Wood Floors/Furniture

What you’ll need: Steel wool, sandpaper, mineral spirits, plastic putty knife, wood filler, natural bristle brush, varnish/ polyurethane. Or crayons!

What to do: Smooth out the scratch with steel wool (for lighter scratches) or sandpaper (for deeper scratches). Make sure to follow the wood grain when doing this. Rub mineral spirits over the scratch to further smooth it out and clean up the fine dust from sanding.

Using a plastic putty knife (to avoid further scratches), fill in the scratch with wood filler that matches the color of the rest of the floor/furniture. Let dry, smooth out with light sandpaper and clean up the dust. Finish off with varnish or polyurethane to match the rest of the floor.

Or, pick a crayon that closely matches the color of the scratched wood, melt it in a microwave over greaseproof paper, and then use a putty knife to fill in the scratch!

For more help getting that security deposit back, make sure to read our two guides on properly vacating an apartment, here and here.

Thanks for reading! If you liked this post, please recommend or share it with others. 🙂

Want to talk? Connect with Moved on Facebook, Twitter, and Instagram!

The Best Smart Home Devices for Your New Abode — Part 2

This is part two of our series on the smart home devices you need to get your hands on this year! Make sure to check out part one here.

Lifx Color 1000 ($59.99)

Lifx bulbs are energy-efficient, color-changing light bulbs. An easy-to-use app allows you to select the exact color you like, as well as select between themes, such as “tranquil”, “cheerful” and “exciting”. You can schedule bulbs to turn off/on at set times, and select how long you want the bulbs to take to do so. You can have your bulbs slowly turn on over the course of 15 minutes, simulating a sunrise to ease you out of bed in the morning. You can even sync the bulbs to pulse in beat with music! Lifx bulbs also sync with the Amazon Echo, allowing you to execute commands like “Hey Alexa, dim the Lifx bulb by 20% and switch the color to blue.”

Philips Hue Wireless Dimming Kit ($39.99)

Think of this as a starter kit for smart home light bulbs. There’s no app or integration with third party devices like the Echo — this is simply a light bulb you can dim remotely with a small remote. Just screw in the bulb, pull the plastic from the remote to activate the battery, and you’ll be dimming in seconds! The dimmer remote can control up to 10 of these bulbs at once, and can dim them all the way down to less than 1% of the bulb’s full brightness.

August Smart Lock ($199)

Retrofit this device to your existing deadbolt (compatible with most Baldwin, Kwikset, Schlage models) and you will have added a smart lock to you home! This device connects to your phone via Bluetooth, letting you lock/unlock your door remotely, when in Bluetooth range. Auto-lock and -unlock features are also available. Just leave the house and the August smart lock will lock up behind you! You can also send your friends/family virtual “keys”, letting them connect to the lock via Bluetooth when in range, so they can enter your home without you needing to come home and give them a key.

SkyBell HD Wi-Fi Video Doorbell ($199)

This is truly the doorbell of the future! This doorbell features 1080p HD video, available to view livestream. You can set it up to record when its motion sensor is triggered (i.e. when someone walks up to the door) or when the doorbell is rung. It can also send you push notifications in both of these cases. Video recordings and snapshots can be saved and downloaded to your phone easy-peasy. The SkyBell integrates with Amazon’s Echo, IFTTT and Nest Cam.

iSmartAlarm ($149.99)

iSmartAlarm finally brings us a smart, affordable DIY home security system that competes with the big-name brands. A basic package includes a motion detector, two contact sensors (for detecting opened doors/windows), two remote tags for your keychain (allowing you to remotely arm/disarm the system) and the CubeOne, the system’s brain. You can add as many sensors, sirens, cameras and remotes as you like.

All of these devices are controlled via the iSmartAlarm app, available on iOS and soon on Android. In the app, you can arm/disarm the system, activate the panic siren, and go into “home mode” which disables the motion sensors but leaves the contact sensors on. When a sensor is triggered, the panic alarm will go off and you’ll receive a text alert telling you what’s happening.

Thanks for reading! If you liked this post, please recommend or share it with others. 🙂

Want to talk? Connect with Moved on Facebook, Twitter, and Instagram!

The Best Smart Home Devices for Your New Abode — Part 1

The future is upon us — finally, we’re starting to see the gadgets of our favorite sci-fi movies come to life! Moving is a perfect time to upgrade your home-living experience to the next level. Here are four smart home devices that will help you do just that:

Amazon Echo ($179.99)

The Echo serves as the all-around centerpiece of smart home devices. It can basically control your whole house! The Echo is a high-quality speaker, housed in a water-bottle sized black cylinder. It works like this: you say its “wake” word (“Alexa”, “Amazon”, or “Echo”), and then tell it what to do. It can do quite a lot, and the list is growing. It can play music for you, or podcasts or audiobooks, read you the news, give you weather/traffic reports, give you facts, do calculations, set timers, hail a ride from Uber, stream music from Spotify or order pizza from Domino’s.

Depending on what “skills” Alexa has (basically apps synced with the device), “she” can also walk you through cocktail recipes, tune your guitar, or help you with Minecraft. Echo also syncs and integrates with other smart home devices, such as lights, thermostats, garage-door openers, security systems, etc.

Amazon Echo Dot ($90)

The Echo Dot is half the price of the full-sized Echo, and much smaller: about the size of a hockey puck. It does everything the Echo does, with smaller speakers. You can sync it with your own sound system however, making this possibly the best smart home device deal on the market right now.

Belkin WeMo Switch ($49) + Motion (+ $30)

This device is small and simple. Plug it into any electrical socket, then whatever you plug into it you’ll be able to control from your smartphone, with the free WeMo app. Using the app, you can turn devices off and on remotely, schedule them to turn off/on at certain times, or program them to turn off/on when the motion sensor is triggered.

The WeMo switch also features full IFTTT integration. IFTTT (If This, Then That) is free online tool that allows you to link apps, Web services and smart devices together. The sky’s the limit here. Using IFTTT integration, you could set it up so that you get a text alert every time someone walks by the motion sensor, or when the kids turn on the Xbox.

Nest Learning Thermostat ($249)

At its most basic, the Nest is a smart thermostat that syncs to an app on your smartphone, allowing you to control the temperature remotely. You can set maximum and minimum temperature ranges while you’re out of the house and program temperature changes at specific times of the day. Nest helps you save energy and money by monitoring your daily energy usage, air humidity, and informing you (with a small green leaf in its beautifully designed display) when you’re in a temperature range that will save you money. The Nest will also learn your habits over time, eventually making temperature changes for you.

For more of the best smart home devices, make sure to check out part 2 of this series!

Thanks for reading! If you liked this post, please recommend or share it with others. 🙂

Want to talk? Connect with Moved on Facebook, Twitter, and Instagram!

Finding the Best Rental Truck Deal

So you’ve decided to move yourself — congratulations! Now it’s time to find a rental truck.

In this article we lay out the different options available to you, what is typically offered by most companies, and some tips to make sure you get the best deal out there.

What Can You Get

Vehicles — This is where rental truck companies most clearly differ. Most companies offer cargo vans, and couple truck options, ranging in size from 10 feet to 26 feet.

  • Cargo vans and trucks in the 10–12ft range are usually enough for kids moving to and from college and those moving out of studio apartments.

  • Medium-sized trucks in the 14–17ft range are good for small apartment or homes in the 1–2 bedroom range.

  • Large trucks, 12–26 feet are perfect for larger, 3–4 bedroom places.

Other rental options — Some companies also offer other rental options, such as portable storage units, trailers, and car-towing. There are two car-towing options: the tow dolly, where the car’s back wheels roll along the road, and the car carrier, the more expensive option in which the vehicle is fully off the ground.

Local vs. long-distance — Some truck rental companies offer both local and long-distance move options, but not all. For local moves, you’re required to drop off the truck at the same location from which you picked it up. Long-distance moves allow you to drop off the truck at a new location nearby your home. Making sure there is a location near your new home will factor in your choice of rental truck companies.

Insurance — Most basic contracts will include minimum liability insurance, but this usually won’t cover much. You do have multiple options for extra insurance:

  • Supplemental liability insurance — Generally maxes out at $1 million.

  • Damage waivers — Covers accidental damage to rental truck, and usually includes theft.

  • Auto tow protection — Covers damages to car-towing equipment.

  • Personal accident insurance — Covers your medical costs, though these will usually be covered already by your health insurance or car insurance if you have medical coverage

  • Cargo insurance — Covers your belongings in case of damages

How to Get the Best Deal

Be realistic — First things first: forget about the stickers you’ve seen on the sides of rental trucks advertising $19.99! Depending on the specifics of your move, a few hundred dollars is a much more reasonable amount to budget for. If you’re moving a large house long-distance, you could be looking at $1000–2000.

Book in advance — Truck rental prices are based on demand, a lot like airline tickets. This means that booking right before the move will be more expensive. The companies know you need the truck, so they’ll jack up the price. So book far in advance for the best price.

Book at the right time — Just like with moving companies, the cheapest time to rent a truck is in the middle of the month, in the middle of the week, in the middle of winter. As much as you can, avoid booking on weekends, at the end of the month and during summer, when demand is highest.

Look around — Make sure to get quotes from every moving truck company, and try playing around with different dates, and different pickup and drop-off locations in each city. Some companies offer competitive pricing, so once you find an especially cheap rate (say, from a coupon or discount deal), bring it to another company and see if they’ll offer you a better deal.

Thanks for reading! If you liked this post, please recommend or share it with others. 🙂

Want to talk? Connect with Moved on Facebook, Twitter, and Instagram!

What to Throw Away When You Move

Why do we hold to things we haven’t used in years, even things that are broken and utterly useless?

Perhaps it’s human nature, perhaps it’s resistance to change, perhaps it’s that ever-present rationale: “just in case!”. Whatever the reason, we often talk on the Moved blog about how moving time is purging time. So roll up your sleeves and get out the trash-bags.

These are the things you should throw away when you move:

Magazines — Chances are you have stacks of old magazines lying around your house. Newer magazines you could try donating to doctor’s offices, nail salons, libraries, etc., but if they’re more than a couple years old, it’s time to toss ’em. Same goes for old calendars.

Receipts/Bills/Paychecks — Admit it: you’re never going to categorize all those receipts as part of your budgeting plan. Old bills are just cluttering up your space, and paychecks older than two years are deadweight. Get rid of them!

Cosmetics — Just because cosmetic companies are not required to include expiration dates on their packaging doesn’t mean their products don’t expire! Use the following guidelines to know if it’s time to ditch your old makeup: powders (two years), blushes (12–18 months), oil-free foundation (one year), cream compact foundation (18 months), concealers (12–18 months), lipstick/lip liner (one year), lip gloss (18–24 months), pencil eyeliner (two years), liquid or gel eyeliner (three months), mascara (three months).

Underwear — We all have the “just-in-case” pairs full of holes that we never actually wear; time to throw them away for good.

Greeting/Birthday Cards — Yes, some are super sentimental and you’ll cherish them for life. Most of them are clutter. Be ruthless, people!

Spices — While spices and dried herbs won’t go “bad” necessarily, they will get stale and lose their flavor. Use your senses for help, but as a general rule, if you’ve had seasonings, herbs and ground spices for more than 2–3 years, it’s probably time to replace them.

Shoes — Everyone seems to have a pair (or four) of worn out shoes that they never wear anymore but can’t seem to get rid of. Well, now’s the time! Same goes for old flip-flops.

Holiday Decorations — The weird Thanksgiving turkey statue your aunt inexplicably gave you as a gift one year, the broken Christmas lights, the box of cheap plastic Halloween decorations — all destined for the trashcan.

The Junk Drawer — Every home has one. Full of matchboxes, scraps of paper, expired coupons, dried-out markers and pens, thumbtacks, white-out bottles, dried up super glue, broken rubber bands, half-used tubes of Chapstick, paperweights, random collections of string, etc. etc. Save the one or two items in there you actually use and dump the rest!

If you’re having trouble letting go of something, follow the advice of Marie Kondo, author of The Life-Changing Magic of Tidying Up. She says to lay everything out you own, and only keep the things that bring you joy to look at. If something makes you feel tired, guilty, unhappy, etc. get rid of it!

For more help getting rid of your unwanted and unneeded items when moving, check out our guides on What to Sell and What to Donate.

Thanks for reading! If you liked this post, please recommend or share it with others. 🙂

Want to talk? Connect with Moved on Facebook, Twitter, and Instagram!

What to Donate When You Move

As we’ve said many times on this blog, moving is the perfect time to purge your life and home of unwanted, unneeded clutter. Donating things is a win-win situation, where you benefit from a lighter load to move and less clutter in your new home, and others benefit from access to items they truly need.

Here’s a of things you can donate:

Clothes — If you haven’t worn a piece of clothing in the last couple months (or years!), and you can’t sell it for a profit, donate it! Goodwill and The Salvation Army were built for times like these. Most likely there is someone out there who could benefit more from that old sweater hanging in the closet than you currently do. Baby clothes are also perfect to donate.

Socks — Socks are often the most needed but least donated piece of clothing in donation centers and homeless shelters. Of course, if they’re full of holes and falling apart, throw them away. But if they’re still in good condition, you just don’t ever wear them, definitely donate them!

Books — Use the same rules for books as for clothes: if you haven’t touched it for months, or for years, then get rid of it. The smiles you’ll get from librarians and bookstore owners when you walk in with a box of books will make it all worth it.

Blankets — Blankets are extremely valuable items to people out there with no access to heating. If you’re looking for a valuable donation, consider parting ways with some of your blankets.

School Supplies — There are many schools in dire need of pencils, erasers, pens, notebooks and backpacks, especially in the middle of the school year.

Cellphones — Most old phones you won’t be able to sell anyway, so why not donate them? Folks are always in need of working phones for emergencies and day-to-day life.

Grocery Bags — Sturdy, reusable bags make buying groceries much easier for families that rely on public transportation to get around. Donate unused bags that could be used to carry food to your local food pantry.

Toilet Paper — Toilet paper and other basic hygiene items are almost always out of stock at donation centers. Consider donating your extra rolls and buying new ones in your new hometown.

Toys — If they’re still in workable condition, there are always families in need of new toys for their children to play with. Complete board games are a favorite at donation centers.

Furniture — Many people think thrift stores and places like Goodwill only want clothes and other small items. Not so! They will happily accept donated tables, chairs, couches, bed frames and clean mattresses as well.

Appliances — As always, only if they’re in working condition! Large appliances like dishwashers, washing machines and dryers are in especially high demand, though smaller items like coffee makers, toasters, and vacuums will also be quickly adopted by someone in need.

Food — Many people have extra food in their kitchen when they move. Support the Move for Hunger cause and put that food to good use!

For more help getting rid of your unwanted and unneeded items when moving, check out our guides on What to Sell and What to Throw Away.

Thanks for reading! If you liked this post, please recommend or share it with others. 🙂

Want to talk? Connect with Moved on Facebook, Twitter, and Instagram!

5 Tips to Crush a Move All by Yourself

So you’ve taken the leap and decided to tackle your move by yourself, huh?

Well, we applaud your courage and can-do attitude, as we know all too well the craziness of a moving on your own. To keep you sane, organized and moving forward, here are 5 tips to keep in mind:

1. Write Everything Down

One of the most difficult parts of moving yourself is keeping things organized. Not only do you have to keep track of all your stuff, but you have to remember all the little tasks that moving brings along with it, such as updating your address with the government, setting up utilities, and getting rid of extra stuff (a Moved concierge can do all of this 😉).

So help yourself out and create a massive to-do list early on in the moving process. Start with all the questions you need to ask (who can help me move?, where will I stay on my way to my new house?, what do I want to bring?, etc.) and all the tasks you can think of that you will need to complete.

Keep this in a notebook, on your computer, or in the Moved app so you can update it and cross things off throughout the processs.

2. Purge

We’ve said it many times before on this blog, and we’ll say it again: the less stuff you have, the less you have to move! Check out our other guides for help on what to get rid of and how to properly sell, donate, or throw away your stuff.

3. Use What You Have

Why buy moving pads when you have a house full of linens, blankets and towels? Save some money and use what you’ve got lying around to protect your things while moving. Keep in mind, however, that you’ll be setting yourself up for a ton of laundry to do on the other end.

You can also use all the boxes, trunks, laundry baskets, etc. you already own to move your things. Keeping your clothes in dresser drawers will save you a lot of packing time! Just take out the drawers, tape a blanket or towel on top to keep everything inside, and you’re good to go!

4. Get the Right Tools

Rent a dolly from U-Haul or a moving company, and you (and your back) will be thankful later, I promise! Box dollies are two wheeled, stand upright and are great for moving multiple boxes at once. Flat furniture dollies are basically wooden rectangles with four wheels on them. These babies can hold up to 900lbs and are essential for moving heavy items like large screen TVs and dressers.

Make your life easier and rent reusable boxes from a company like Gorilla Bins or Bin-It. The boxes will be delivered to you and picked up when you’re done with them, saving you the hassle of buying boxes, hunting for used ones or figuring out what to do with them when you’re done.

5. Pack and Load Smart

Don’t leave yourself a mammoth packing job to finish at the last minute or you’ll be overwhelmed and nearly crazy by the end of the day. Plan ahead, slowly packing everything you own over the weeks leading up to the move. Starting with what you rarely use and finish with the daily essentials.

Finally, when loading your truck, remember that heavier items go in first, and on the bottom. Strap everything down and don’t exceed your truck’s weight capacity.

Thanks for reading! If you liked this post, please recommend or share it with others. 🙂

Want to talk? Connect with Moved on Facebook, Twitter, and Instagram!

Do It Yourself Interior Design

Moving into a new home is the perfect time to experiment with some DIY interior design. Everything is already in flux, so you might as well tackle those design projects you never got around to in your last home! The phrase “interior design” may conjure up thoughts of expensive home makeovers, but fortunately, there are many ways to spruce up your new home on a budget.

Here are a few fun ideas to get you started!

Removing popcorn ceiling.

Getting rid of the spackle on your ceilings is not as hard as you might think. If you want a smooth ceiling, use a soaked roller to saturate the popcorn with water, then simply scrape it away with a spackle knife. You can also skip this step entirely and just cover up your ceiling with thin tongue-and-groove wood planks or faux-tin Styrofoam tiles.

Custom design with Sharpies.

Take out the inserts of pillows and use a ruler and some Sharpies to add custom graphic designs to your couch pillows. No need to go overboard here — simple lines or grids can go a long way.

Easy-install wall molding.

Adding trim molding to your walls is an easy way to add character to your home. Head to Lowes or Home Depot for some pre-primed trim-board. Use wood-glue to fix it to the wall, secure with nails, add some caulk and paint and you’re done!

The illusion of extra space.

Hanging mirrors is an age-old trick to make hallways and small rooms seem larger than they actually are. Another way to make a small room appear larger is to decorate with low-slung furniture that stands on legs, so you can see the floor underneath. Certain paint colors can also help, such as PPG Paints Swirling Smoke, Benjamin Moore Cloud White, and Farrow & Ball Skylight.

Open up cabinets.

Add some character and space to your kitchen by removing cabinet doors. You can also now add a piece of art to the back wall to pretty up the space!

Paint, paint, paint.

Paint is one of the easiest, cheapest ways to transform your home. Experiment with different hues for the kitchen, bathrooms and bedrooms. With a few coats of paint, you can also spruce up dingy items found at estate sales or thrift shops, such as old dressers, vases or frames.

Bring in the nature.

Scattering plants around the house is a wonderful way to breathe some life into the room… literally! Succulents are super easy to take care of, and some plants will purify the air in your home, such as spider plants, snake plants, golden pothos, and aloe vera.

Use the rule of three.

Interior design experts have known for years this simple styling secret for surfaces like coffee tables, mantels, and hallway dressers. Use three objects, of different sizes and shapes: something tall and vertical, something wide and horizontal, and something curvy and sculptural to tie it all together.

Hang artwork right.

Hang artwork so that the center of the piece is around 57 inches from the floor; this is the average sightline for most people.

For more tips on making your new house or apartment feel like home, make sure to check out our guide on the topic, here.

Thanks for reading! If you liked this post, please recommend or share it with others. 🙂

Want to talk? Connect with Moved on Facebook, Twitter, and Instagram!